
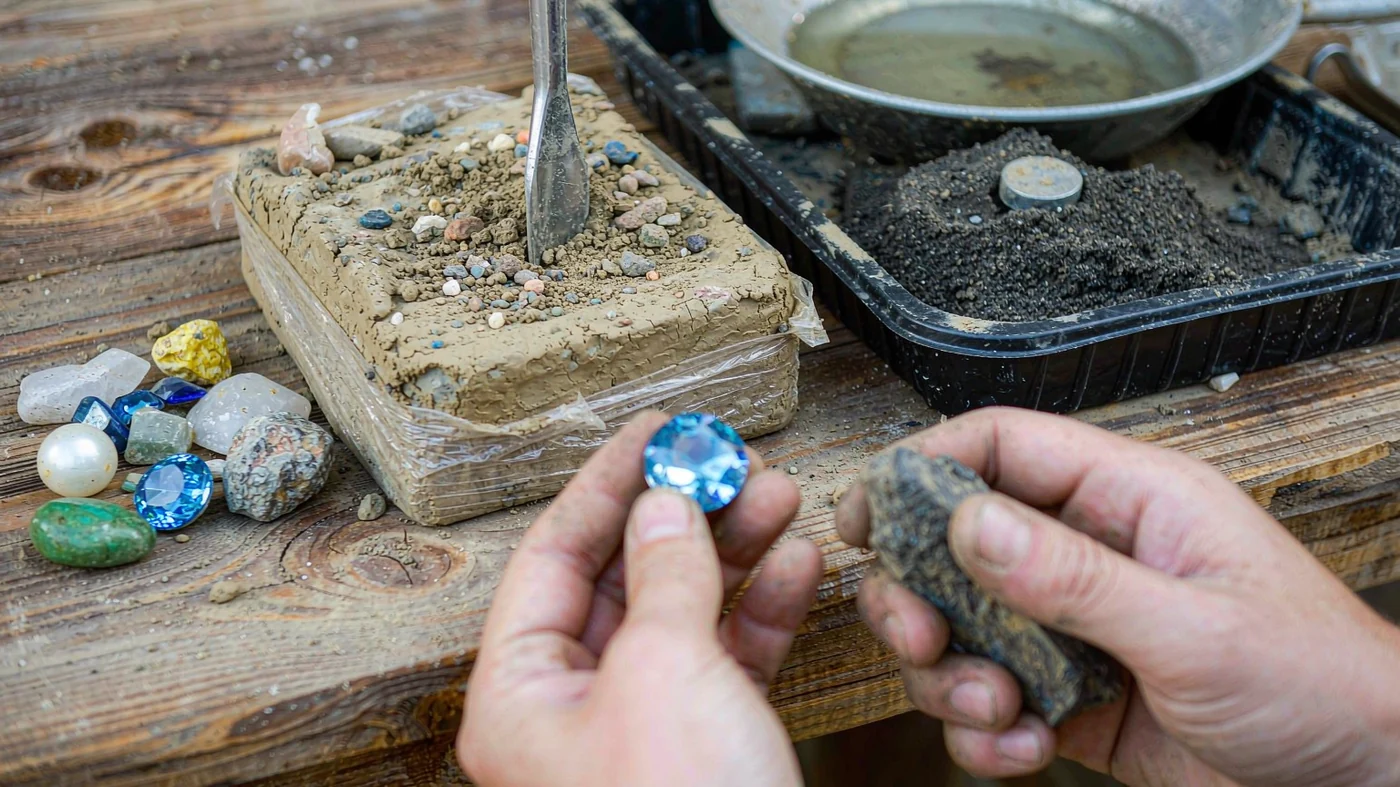
The main difference is how children uncover the finds. A block-style gem mining kit lets them chip and brush stones out of a molded block. A gold panning kit uses water and a pan to separate denser material from loose sand or gravel. Choose the digging block for a tabletop excavation and a collection to sort afterward. Choose the pan if you can manage wet sand and want to explore how separation works.
Here, “gem mining kit” means an excavation block, not a bag of loose gem-bearing material sold for washing or sluicing. Product names can overlap, so check the activity and contents rather than relying on the name alone.
Gem Mining Kit at a Glance
A block-style kit contains hidden stones and digging tools, often with a brush or identification guide. The task is to remove the surrounding material carefully, then examine the finds. The stones may be polished or rough; the exact selection depends on the product.
For a concrete example, Piano Potato’s 12-gemstone dig kits product page lists twelve separate blocks, each with a plastic chisel, brush, and guide. It specifies ages 6+ with adult supervision. That is guidance for this particular set, not a minimum age for every digging kit. The wider dig and explore excavation kits category includes other digging activities with different contents.
Plan for crumbs and dust on a covered work surface. Do not assume every block is meant to be used dry: follow its preparation and dust-control instructions, including any directions about water. Unlike panning, the defining action is removing a solid matrix, not washing loose sediment.
Gold Panning Kit at a Glance
Check whether the set includes a pan only or also supplies sand, gravel, or pay dirt. Tweezers and a vial may be included for collecting small finds. Real gold, other minerals, and imitation gold-colored pieces are different contents; none should be assumed from the words “gold panning kit.”
The underlying science is a difference in density. USGS gives pure gold a specific gravity of 19.3 and associated waste rock about 2.5. Specific gravity is a unitless comparison with water. Dividing those values gives about 7.7, so equal volumes of pure gold and that rock have very different masses. This explains the natural separation principle, not the composition or behavior of imitation pieces in a toy [1].
A gold pan is a shallow vessel with sloping sides and a flat bottom. Water and controlled movement help wash away lighter sediment while denser material collects toward the bottom. USGS describes panning as a simple prospecting method that takes practice to master; children should not expect perfect separation on their first attempt [2].
Side-by-Side Comparison
| Feature | Block-style gem mining kit | Gold panning kit |
|---|---|---|
| Starting material | Solid molded block with hidden stones | Loose sand, gravel, or pay dirt, if supplied |
| Main action | Chip, scrape, and brush | Submerge, agitate, and carefully wash sediment away |
| Setup | Covered table or tray; prepare the block as instructed | Pan, water, and a tub or other suitable work area |
| Typical mess | Block crumbs and dust, or damp debris if water is directed | Wet sediment and splashes |
| Finds | Stones specified by the product | Gold, other minerals, or imitation pieces, as specified |
| Learning focus | Careful excavation, observation, and sorting | Controlled movement and separation by density |
| Reuse | Keep the tools and specimens; the excavated block is consumed | Keep the pan and tools; reuse suitable material only as directed |
How to Set Up a Useful First Session
A tabletop digging session
The I Dig Gems product page describes a practical sequence: cover the work surface, remove small amounts around the emerging stone, brush away loose material without blowing it, then compare and label the find. These are the manufacturer’s published directions, not a report of our own hands-on testing.
For a first session, try about fifteen minutes and pause to see whether your child wants to continue. That is a planning suggestion, not a promised completion time. Put the finds on white paper and ask for a description before a name: “blue with pale streaks” is an observation a child can check. Compare it with the supplied chart, then write the listed name and one visible feature on a paper label.
A chart is a starting point, not proof of identification. The National Park Service explains that mineral identification uses several properties, including hardness, luster, streak, cleavage, and specific gravity; color alone can vary. For this activity, stick to observation and the supplied guide rather than adding scratch or chemical tests [3].
A contained panning session
For a home setup, place the pan inside a larger tub so discarded material stays contained. Start with a small portion of the supplied mixture and follow the kit’s water and movement instructions. Let an adult demonstrate before handing over the pan.
If your child tips everything out, keep the discarded sediment in the tub rather than throwing it away. Where the instructions allow, return a portion to the pan and try a gentler movement. Ask what remains and what washes out. This is a suggested troubleshooting exercise, not a claim that we tested a particular kit. With imitation pieces, follow the kit’s explanation rather than assuming they behave like natural gold.
Safety and Cleanup
Neither activity is automatically suitable for a younger child just because an adult is nearby. Follow the exact age label and supervision directions, and keep loose finds and small tools away from children who mouth objects. In the United States, products intended for children under three that present a small-parts choking hazard are banned under the applicable small-parts rule. Certain other children’s products require choking-hazard warnings; a warning does not make an older-child kit suitable for an under-three [4].
For digging, contain debris in a tray, do not blow dust toward faces, and follow the manufacturer’s dust-control directions. Collect the block debris rather than rinsing it down a drain. Keep food and drinks away from the work area, and wash hands with soap and water afterward [5].
For panning, use towels around the tub, wipe up splashes promptly, and supervise the water activity. Keep sediment out of the sink drain and follow the kit’s disposal directions. Clean and dry the pan and any finds as instructed before storage. If a combined set includes crystal-growing powders or other chemicals, read those separate instructions before use; this comparison does not assess their chemical safety.
Which Kit Should You Choose?
Choose a digging block for individual excavation
A block is a practical choice when each child should have a separate task and a specimen to label afterward. For parties or classrooms, compare the number of complete tool sets, not just the total number of stones. The party and group play sets include multi-packs to consider, but still check each product’s age guidance and contents.
Choose a pan for a water-based separation activity
Panning fits a supervised outdoor station or a contained indoor tub where there is time for demonstration and retries. It is less convenient if you have no place to contain wet sediment or dry the equipment. The pan can support another session with suitable material, while an excavated block cannot be restored to its original state.
Outfitting a classroom or a birthday party? Tell us the age group and headcount, and we will help you match the kit.
Common Questions About These Kits
Are the stones or gold pieces real?
Read the contents list and material description. A natural stone can also be treated; “natural” and “untreated” do not mean the same thing. GIA explains that treatments can change a gem’s appearance and may affect its care, so look for treatment disclosures and any special instructions [6]. Gold-colored pieces are not proof of gold content. For more detail on comparing specimen lists, the guide to choosing a gemstone dig kit covers collecting options and labels.
Which kit is less messy?
Neither wins in every setting. A block keeps the activity on a tray but can produce dust and crumbs. Panning avoids chipping a block but creates wet sediment and splashes. Choose the mess you can contain and clean up, and check whether the digging kit directs you to dampen its block.
Can children share kits in a classroom?
Yes, if you plan turns and follow the age and supervision guidance. For simultaneous individual digging, provide a block and suitable tools at each work spot. For panning, a supervised station can serve children in turns. Set out collection containers and a cleanup area before starting, rather than assuming every child needs a separate pan.
The Bottom Line
Compare the process first: excavating a solid block versus washing loose material in a pan. Then check the actual specimens, age label, tools, preparation directions, and cleanup needs. A digging block suits a specimen-focused tabletop session; panning suits a contained water activity with room for practice. Neither the kit name nor the color of the finds guarantees what is inside.