
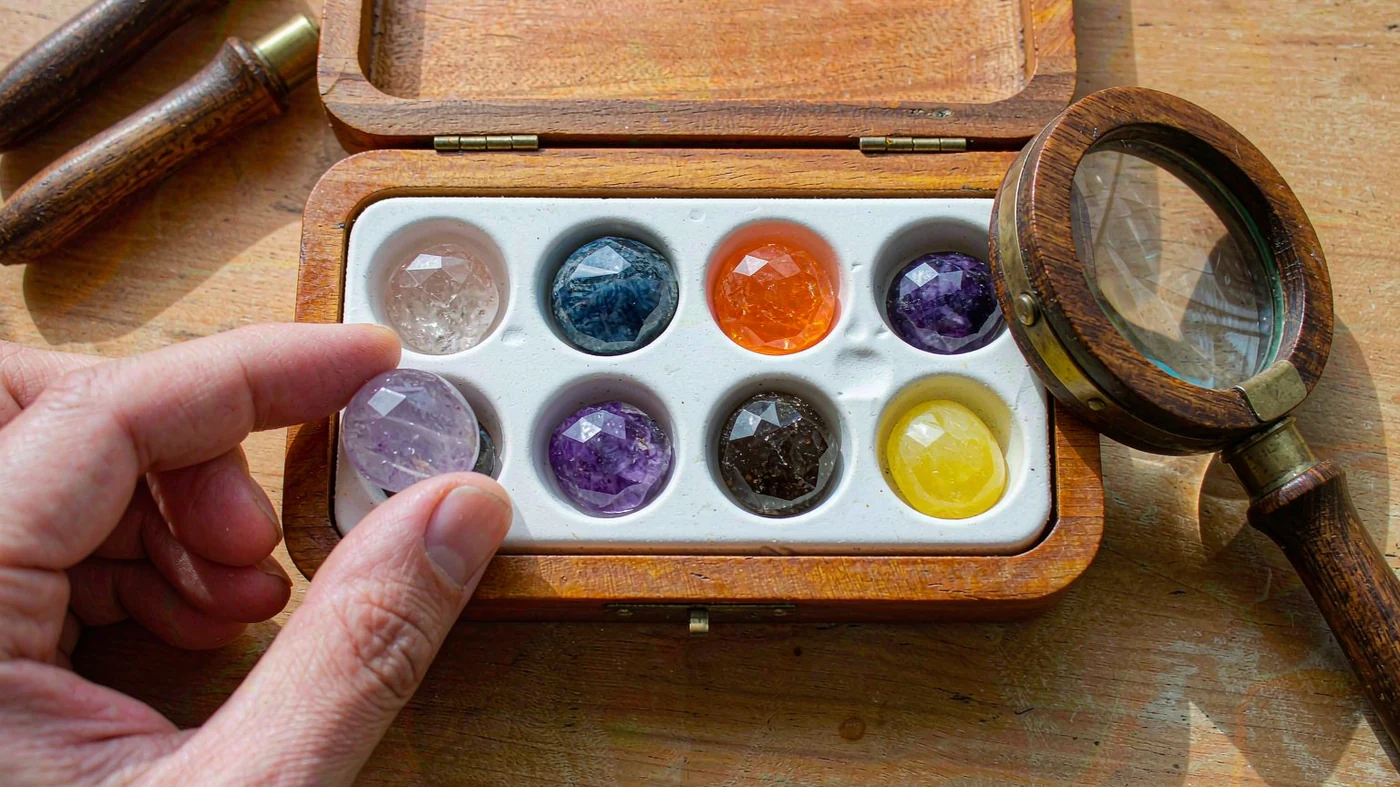
Display gems from an excavation kit in a divided tray or shallow, lidded case, with each dry stone beside its label. Use a clear jar if you want a colorful collection rather than individually identified specimens. Keep a shadow box flat unless it has a purpose-built insert that holds the stones securely. These displays need no glue or drilling.
Start by counting and measuring the finds you actually recovered. Choose compartments that fit both the stones and their labels, then check that the lid closes without pressing on them. Keep loose gems away from children under 3, and follow the kit’s age label and handling instructions.
Clean and Dry the Finds Before Display
Follow the supplied guide for releasing and cleaning the stones. Work around each find gently and brush away loose block material as directed. Do not blow dust off the stone. Collect block debris rather than washing it down a drain. Do not add soaking, chemical cleaners, heat, grinding, or drilling to the instructions.
Let cleaned stones dry before putting them into a closed display or writing color descriptions. If the guide permits water, let any washed finds dry fully first; do not assume every kit specimen can be soaked. Keep the tools and leftover digging material separate from the finished collection.
Sort by Appearance Without Guessing the Identity
Arrange the dry stones by main color, or group them by spots, bands, and mostly solid color. You do not need to use both arrangements at once. Leave an uncertain or mixed-pattern stone in its own space rather than forcing it into a group.
Compare each find with the supplied chart, but treat the chart name as the supplier’s listed identification. Color alone does not establish a mineral’s identity; geologists also consider properties such as hardness, luster, and cleavage [1]. Write “unidentified” when the match is unclear. You do not need scratch or acid tests to make a useful display.
If the child wants a separate geology activity, the guide to observation, testing, and dig kits explains the different formats. Keep that activity separate from arranging the collection.
Choose a Display That Fits Your Collection
Use the table to choose between keeping individual identities visible and showing the collection as a whole. A tray, labels, and storage case are extra supplies unless your kit specifically includes them.
| Display | Best use | Main limitation |
|---|---|---|
| Divided tray with a lid | Seeing each stone beside its own label | Stones can move if the tray is tipped |
| Clear, shatter-resistant jar | Showing mixed colors in a small space | Individual stones and labels are harder to match |
| Flat shadow box with compartments | Presenting a collection for explanation | Loose stones need to remain horizontal |
| Compartment box with a photo log | Keeping a growing collection organized between viewing sessions | The photo and list need updating when the layout changes |
Divided Tray for Individual Specimens
Put one stone and its label in each compartment. Check the largest find first: it should fit without wedging against the sides, and the lid should clear it. A clean, dry egg carton can serve as a temporary sorting tray, but use a suitable lidded container for storage. Open the tray for supervised viewing, then close it and put it away.
Clear Jar for a Mixed Collection
A clear, shatter-resistant jar contains stones that roll, but it is a poor choice when every name must stay matched to a specimen. Keep a collection list beside it rather than implying that list order identifies the stones inside. Choose compartments instead if the child wants to point out a particular named find. Keep the jar closed between viewing sessions and out of younger children’s reach; a lid is not a substitute for secure storage.
Flat Shadow Box for Showing and Explaining
Choose a shallow box with a fitted compartment insert. Lay it flat, position the labels beside the finds, and check the lid clearance. Carry it horizontally. A conventional wall-hung shadow box will let loose stones fall to the bottom, so do not stand it upright unless its insert is designed to retain the specimens. This guide does not require adhesive mounts.
Compartment Box With a Photo Log
Number the compartments and use matching numbers on a collection list. Photograph the arrangement from directly above before closing the box. If a stone moves, update the list and photograph together. The record is useful only while its numbers still match the physical layout.
A Worked Layout for Twelve Recovered Stones
Piano Potato’s I Dig Gems set provides a concrete planning reference. Its listing, checked November 13, 2026, describes 12 separate kits with 12 digging blocks, 12 plastic chisels, 12 brushes, and 12 instruction guides. The product chart lists 12 named finds, and the box is labeled Ages 6+ with adult supervision recommended. Check your own packaging for the applicable contents and warnings.
For a worked example, suppose you have recovered 12 separate stones and want each one labeled. A three-row, four-column compartment layout provides 12 spaces: 3 × 4 = 12. Number them from left to right, place one stone in each, and add the corresponding name and observation to the list. This is a planning example, not a reported dig result or a guarantee about another kit’s contents.
If one find is too large for its compartment, choose a larger insert or give it a separate labeled space. If fewer stones are recovered, leave unused spaces empty. Size the display from the actual finds and available shelf space, not the kit’s shipping or retail box dimensions. For a group activity, the gemstone dig kit guide helps distinguish kit quantities from specimen lists before you divide the materials.
Write Labels That Stay With the Stones
A useful label records the listed name, the dry stone’s main color, and one visible feature. For example, “Sodalite — blue — pale streaks” is suitable only when the supplied guide and your observation support that description. Otherwise, use “Unidentified — blue — pale streaks.” The label should preserve what you know, not conceal uncertainty.
Add the dig date or the child’s name if helpful. For a child who needs less writing, use a short name label and keep the other details on an adult-written collection list. Keep reusable labels when moving stones; replace them only if the information or numbering changes. In a shared collection, agree on one numbering system before combining the finds.
Store the Display Safely
A kit labeled 6+ remains intended for that age range even when an adult is present. Keep loose gems and tools away from children under 3 and from anyone who mouths small objects. U.S. small-parts rules address choking, aspiration, and ingestion hazards in products intended for children under 3 [2]. Do not treat a decorative jar or display case as child-resistant packaging.
For U.S. toy-safety context, CPSC identifies ASTM F963-23 as the mandatory version effective April 20, 2024, under 16 CFR part 1250, with product-specific applicability and regulatory exceptions [3]. This general requirement does not establish that a particular kit has been tested or certified. Piano Potato’s product-safety information is a starting point for questions about the exact product; do not infer a product-specific test result from a general safety page.
Put the closed display on a stable surface where it cannot be pulled down or knocked over, and store it out of younger children’s reach after viewing. Follow the kit’s cleanup instructions and wash hands after digging and handling debris. CDC also lists washing after touching garbage as a key handwashing time [4].
Use the Display for Observation
During a supervised viewing session, choose two stones and ask the child to describe one similarity and one difference. Try rearranging the tray by pattern instead of color, then update the photo if you keep the new layout. This gives the display a purpose beyond storage without requiring destructive tests.
Adjust the writing and sorting task to the child while retaining the kit’s minimum age. The age-by-age STEM guide offers broader activity ideas. CPSC’s age-determination guidance considers children’s skills, play behaviors, and interests when matching products to age groups; simplifying a label does not change the product’s age suitability [5].
For individually named finds, choose compartments and keep each label beside its stone. For a mixed-color collection, use a closed clear jar and accept that individual identification will be less convenient. In either case, keep the finds dry, the record accurate, and the collection securely stored between viewing sessions.
Planning a gemstone dig activity for a classroom, club, or party? Ask Piano Potato about kit contents and age guidance, then plan your display supplies around the collection you want to keep.
References
- U.S. National Park Service: Minerals. Physical properties and identification limits. Accessed November 13, 2026.
- U.S. CPSC: Small Parts Ban and Choking Hazard Labeling. Scope of the under-3 small-parts rule. Accessed November 13, 2026.
- U.S. CPSC: Toy Safety Business Guidance. ASTM F963, regulatory applicability, and version effective dates. Accessed November 13, 2026.
- U.S. CDC: About Handwashing. General handwashing guidance, including after touching garbage. Accessed November 13, 2026.
- U.S. CPSC: Age Determination Guidelines. Matching product characteristics to children’s skills, behaviors, and interests. Accessed November 13, 2026.